
Professional Makeup Project
Emma Freeman
Fibreglassing
Health and Saftey
-
A respirator must be worn at all times and there must be adequate ventilation
-
Fibreglass gel coat and laminating resin contains proprietary polyester resin and styrene monomer which is harmful and flammable
-
the resin is very toxic in its liquid state
-
It will irritate the eyes, skin and respiratory system
-
Hand protection is needed-avoid latex gloves because of how common allergies are
Materials Needed:
-
Glass matting (this is actual glass. It is heated so that it changes it's structure
-
Matting fine surface tissue
-
gel coat resin (this is a thick polymer resin coat that is used to pick up detail before applying resin and fiberglass mat or fiberglass cloth as strength layers)
Benefits of using Fiberglass
-
you can use it as a mold material for baking foam latex in an oven in less time than it takes using stone mold.
-
It is lightweight and very tough. this makes it easier for handling and helps with faster curing times when making foam latex appliances
-
It is easy to use
-
Inflexible (however, you have to be careful of undercutsas you may find it hard to remove the mold)
Key Terms
Cutting Edge-(or blending edge) is where the positive and negative mold parts touch and becomes the thin prosthetic appliance edge that disappears when it is applied
Core-the interior positive portion of a multipiece mould (your sculpt)
Flange-A projecting rim, collar, or ring on a mold that gives additional strength, stiffness, or support and provides an area for clamping or bolting mold sectins together
Flashing-excess casting material in a prosthetic mold that is separated from the appliance by the cutting edge of the mold. Also, the area of the mold where overflow collects
Keys-an indentation or protrusion to aid in precise alignment of mold parts
Undercut-any area of a positive or negative that creats a locking state between the mold and the core

Mould release is used on just the core areas of the mould to help it when it is released.
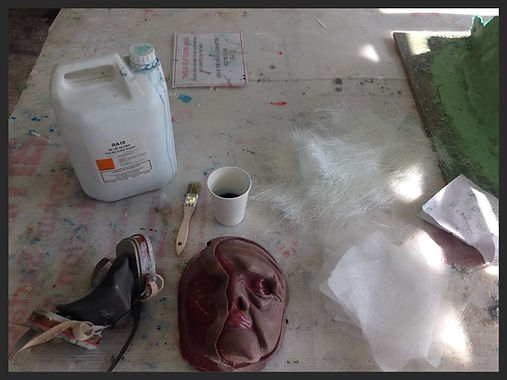
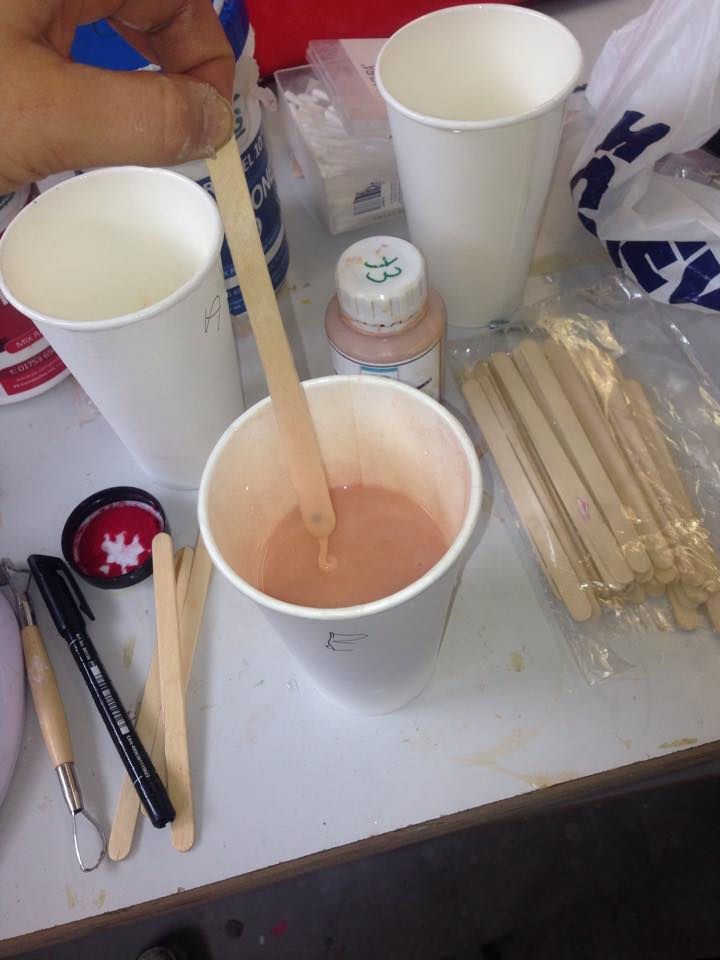
(gloves need to be worn, 2 for extra protection) Gel coat is then measured according to the size of the sculpt with 2% catalyst added. (this changes colour when the catalyst is added). This needs to cure for around 30minutes, until it becomes tacky as it creates mechanical bonds. Next, resin is also weighed out (more is weighed as it needs to be painted onto the sheets of the fibreglass) with 2% catalyst. A mud can be made for the undercuts in the piece, this is made by adding talc (make in a seperate cup and fill in the areas that may have an undercut) it is also added in the keys so it drapes over a lot easier. The sheets are painted onto the sculpt with the resin (the resin attacks the starch), it is better to have the edges of the fibre glass sheets ripped so that the rough edges intertwine (straight edges create a weak edge). A fine surface tissue (often referred to as a vail) is added on top of this to smooth over the sharp fibreglass


I cleaned my mould using wax to create a paste, followed by scrubbing with fairy liquid and a toothbrush. Once my mould was clean, I wanted to practice it in gelatin. I used Vaseline all over as a release agent, melted down my gelatin (I re-used bits from previous projects to save on materials), and filled my mould. I placed my mould in a box and pushed down with pressure and held this in place for around 10-15minutes, I left some gelatin in a bowl so that I could test whether it had set or not. I was very pleased with the outcome of my mould, the edges were blendable and the detail I sculpted came through. Next, I wanted to try this in silicone.


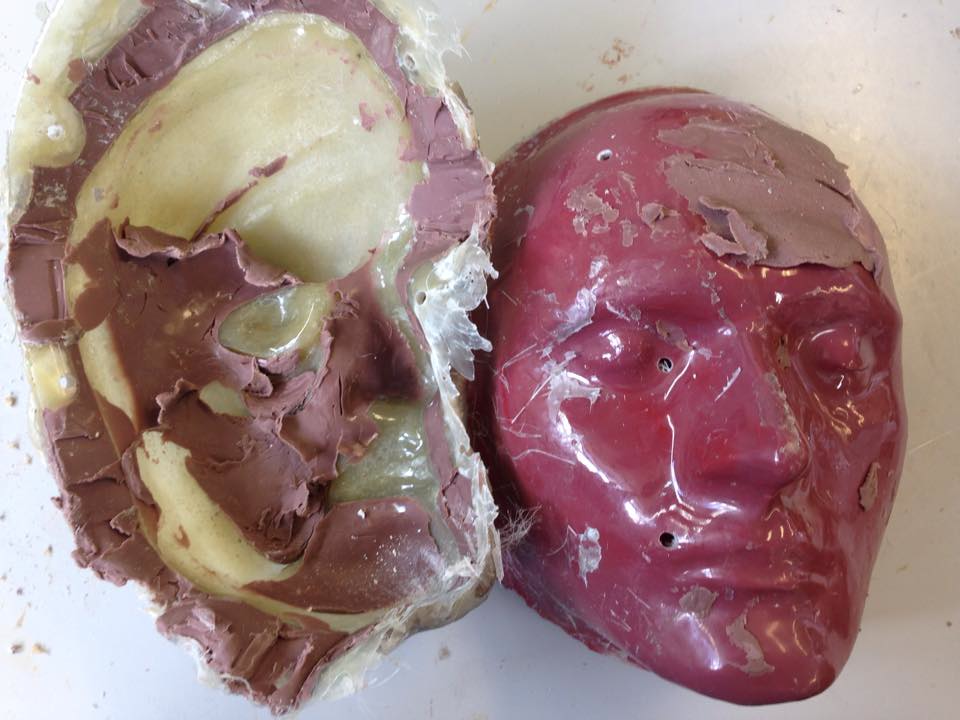
After fibre glassing I used a light under my core to see the keys of where I would need to drill, after drilling I discovered I had fibre glassed too thinly over my keys and it would not be possible to create an injection mould, instead I decided to create a squish mould, this method of moulding may be easier. This is my first squish mould so I was eager to see the result. In order to help the mould apart I fibre glassed a bar in the centre so that I could pull it away more easily. Watching moulding tutorials and research has enabled me to forward think when mould making, it is important to know how to work around mistakes. The squish mould may be an easier method for me and I may come out with a better result.


In order to weigh out my silicone I weighed my gelatine, which weighed 230g. I weighed out slightly more for my silicone at 280g. I used a couple of drops of pigment, a little green food colouring and red flock to add realism. This piece was 70% deadened, I wanted it to be quite soft as it is a face piece. I painted 4 layers of cap plastic diluted with alcohol at the ratio of 3:1 on each parts of my mould. For my squish mould, I built up a box of clay where my mould would sit; I used a board and a heavy tub to compress the silicone as much as possible. I then left this to cure for 3/4hours. Once I started to de-mould my piece, I carefully pealed it away with powder and a brush, the cap plastic however seemed to stick to my mould and was not coming away properly. I finally removed my silicone mould and discovered the cap plastic was much too thin. The edges were not blendable and the piece could not be used. I decided to start again, using a 2:1 ratio of cap plastic to alcohol.
After I de-moulded I had to clean my mould again with alcohol to remove the entire cap plastic. This took a long time to clean; it needed plenty of alcohol and scrubbing with a toothbrush. After I painted on my next layers of cap plastic, before I poured in my silicone I decided to check the cap plastic before I used more of my materials. Again, the cap plastic was sticking to the mould. I then thought this might be a problem with my release agent (I was using Vaseline). Next, I had to clean my mould again to remove the cap plastic. I then used mirror glaze brushed on a buffed into my mould with a cloth, along with mac wax spray to help the cap plastic to be released. Also, for extra precaution, I painted on 5layers of cap plastic so that it was not too thin. I used weight on my mould and left to cure overnight.
Again, my piece did not work. My cap plastic had now stuck to my mould and did not encapsulate my silicone. After some more research I discovered this may have been due to the cap plastic now being too thick. I attempted this piece 3 times, and although I wanted my final piece to be in silicone, I was equally as pleased with the result of it being in gelatine. Also, due to costs I felt it would be unecessary to buy more silicone when my gelatin looked very realistic and also gave me very blendable edges.

My final piece in gelatine


Brick In The Yard Mold Supply (2014) Silicone Prosthetics: Casting A Gel-OO Silicone Prosthetic. Available at: https://www.youtube.com/watch?v=JDVktVIxHl0 (Accessed: 10 May 2015)
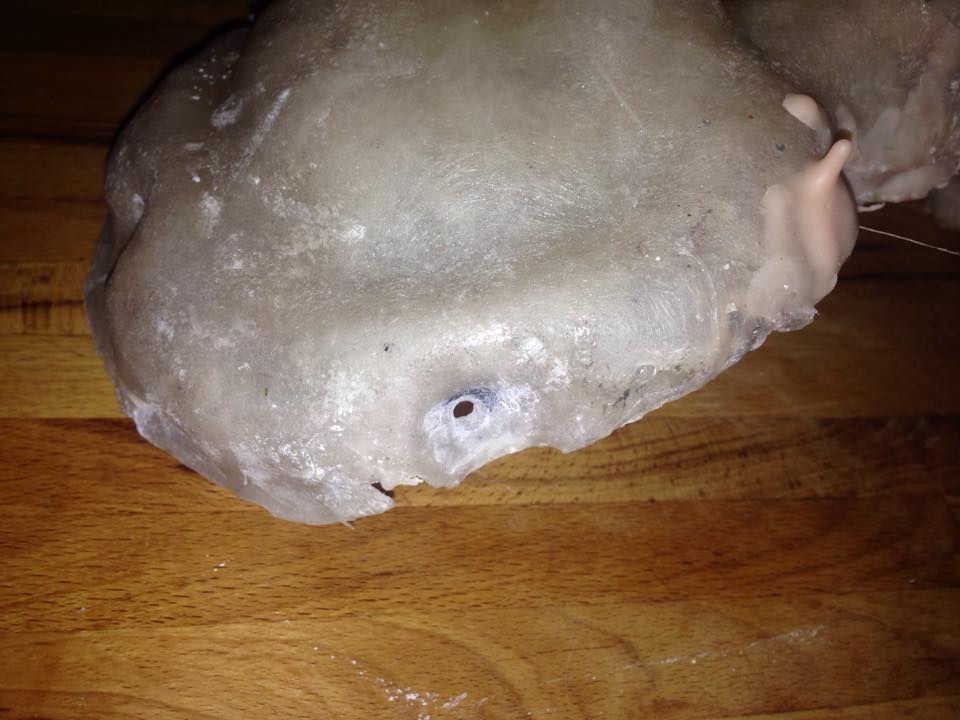
Fibreglass too weak over my keys (injection mould now turns into squish mould)
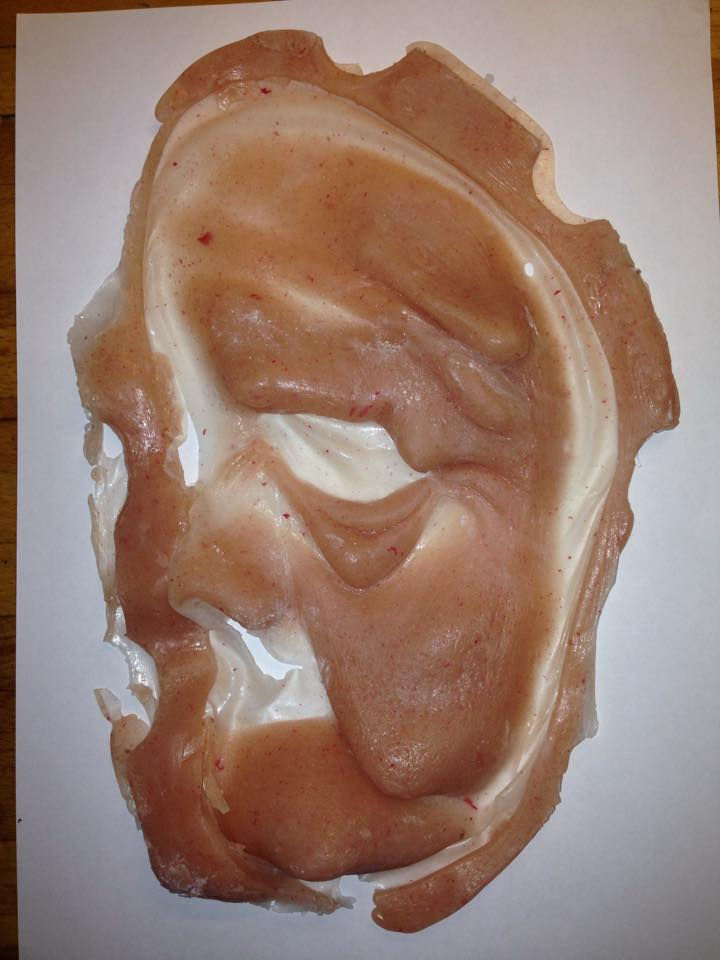
First attempt in gelatin. there is obvous rips and not enough of a blendable edge. It looks as though I need more gelatin to fill my mould. The colour is also too pigmented, for my next experiment I will use more unpigmented gelatin with the current batch.
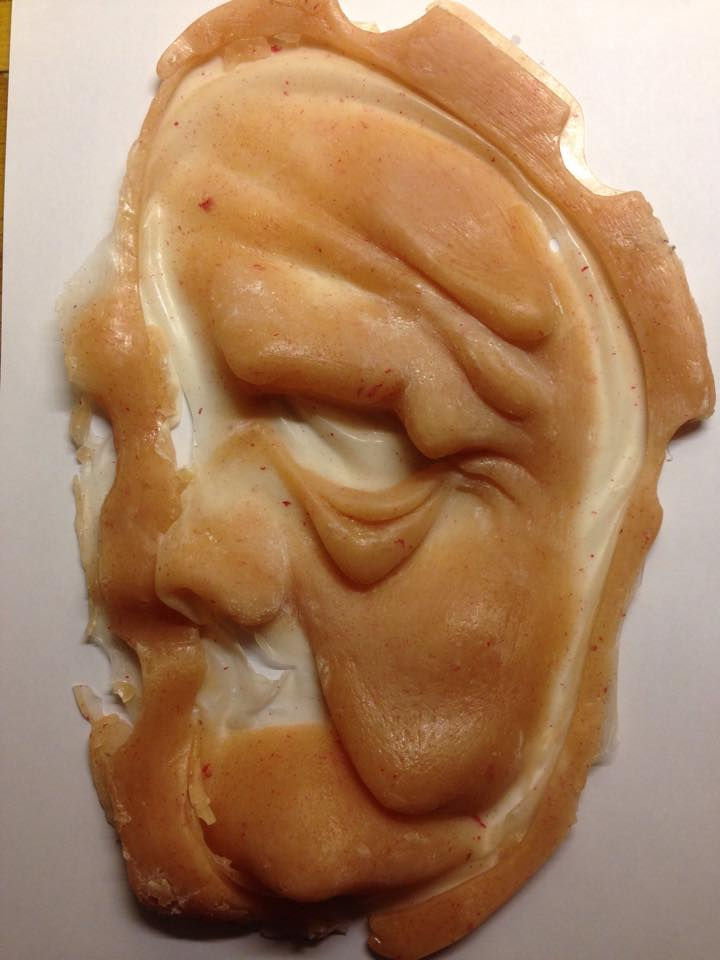
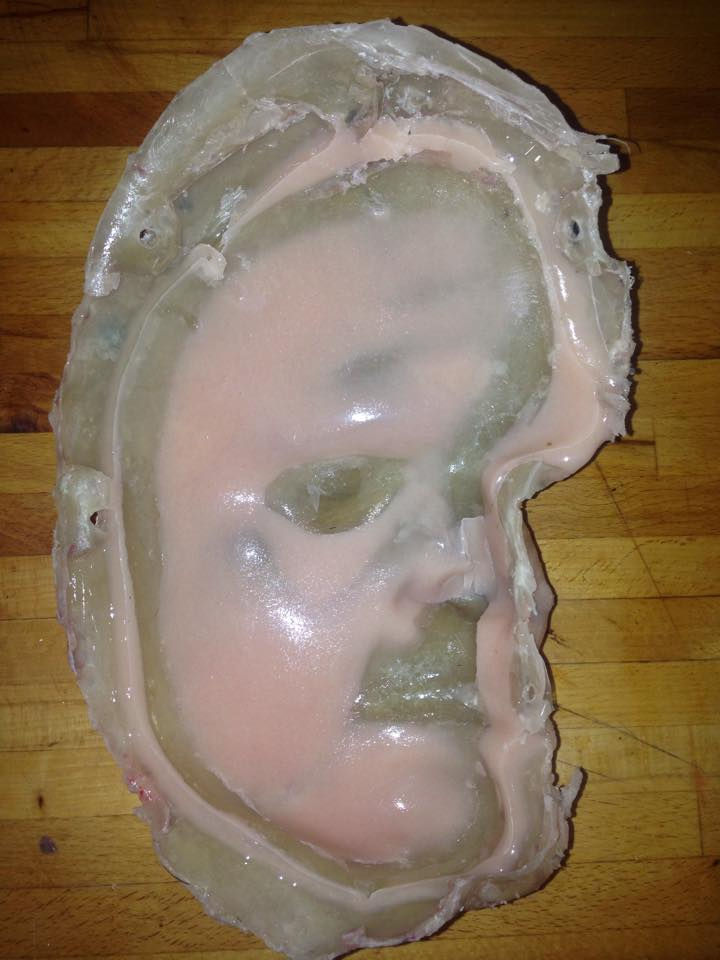
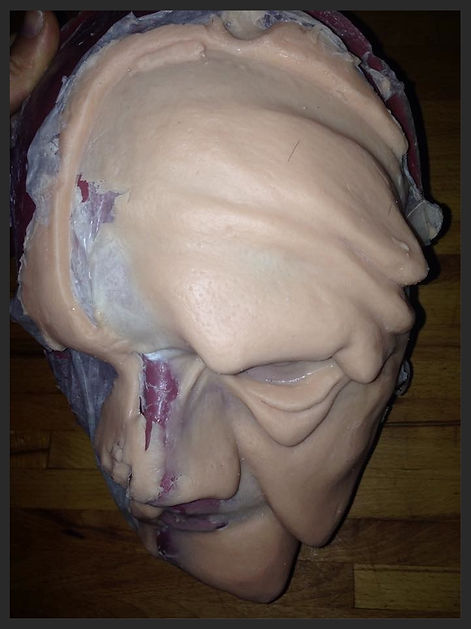
Second attempt in gelatin. I used dustings of powder to stop the piece from sticking together. I am really pleased with the skin texture that has been picked up by the gel coat during fibreglassing


Second attempt silicone. I pused down the mould using as much pressure as possible, and then used a board and heavy objects for the silicone to cure.
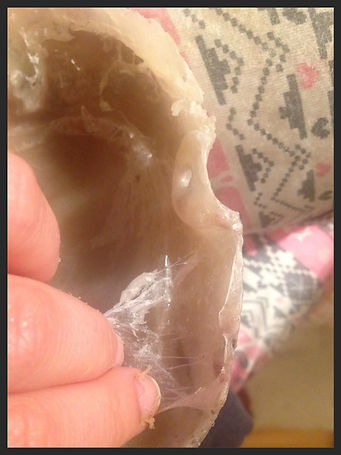
Third attempt of painting on cap plastic, it sticks to my mould and will not come away if I added silicone.